
PS教程!教你合成神秘森林场景
作者:如如酱w来源:部落窝教育发布时间:2017-12-19 17:40:58点击:5996
版权说明: 网络作品,转载请注明原作者和出处。
编按:
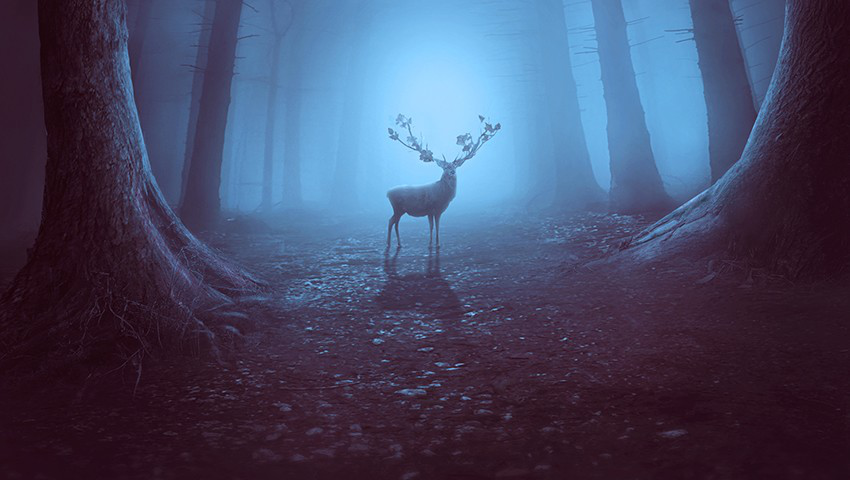
“在漆黑的森林里看到一束光,微若便好 ”,你在这微光森林里踟蹰,不经意的一次回眸,就构成了这幅唯美的场景。本教程教大家使用PS还原这幅森林微光的场景,步骤不多但却很美,适合做合成的初学者。
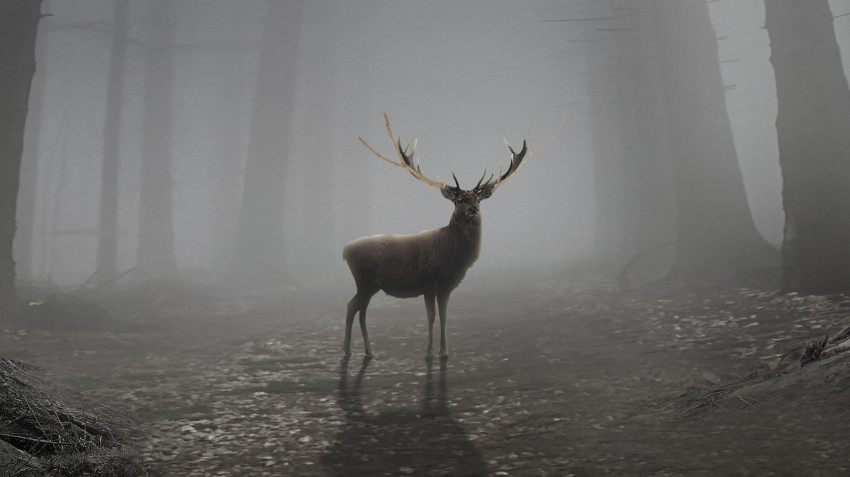
最终效果:
步骤一 构建基础场景
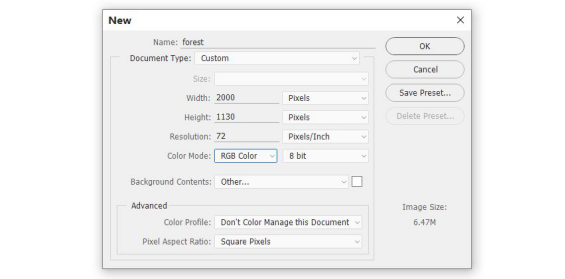
1.新建文档,宽 2000px,高 1130px
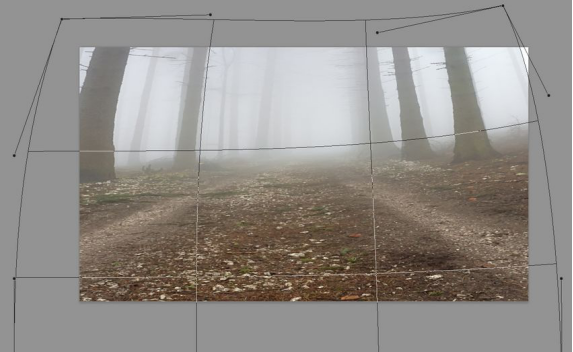
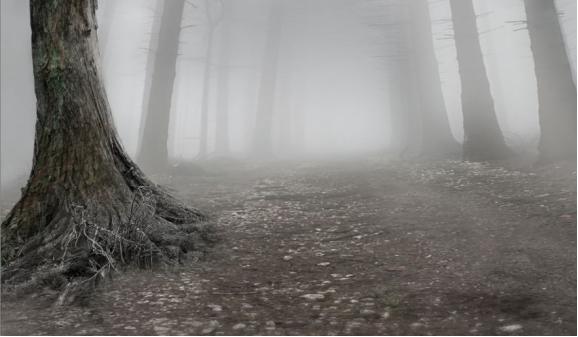
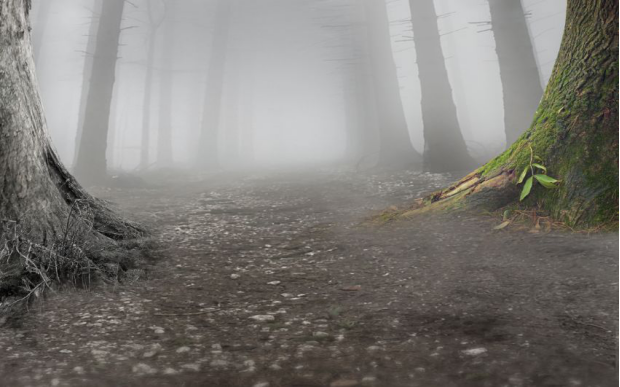
2.导入森林素材,按 Ctrl+T ,右键选择变形,做出如图所示效果(原素材失链,只找到类似素材)
3.右键把森林素材转换为智能对象,点击滤镜-模糊-高斯模糊,半径 8px,在蒙版上用黑色柔边画笔擦除背景

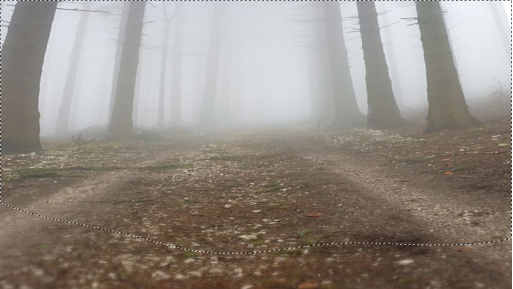
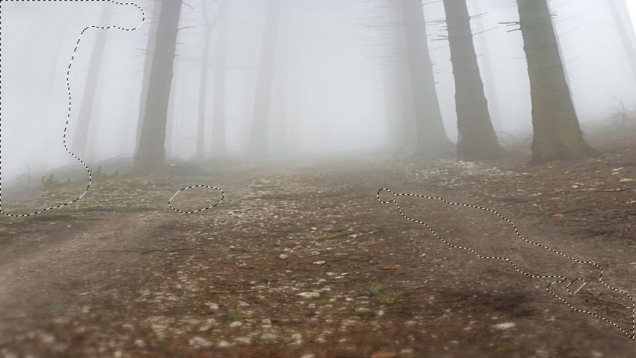
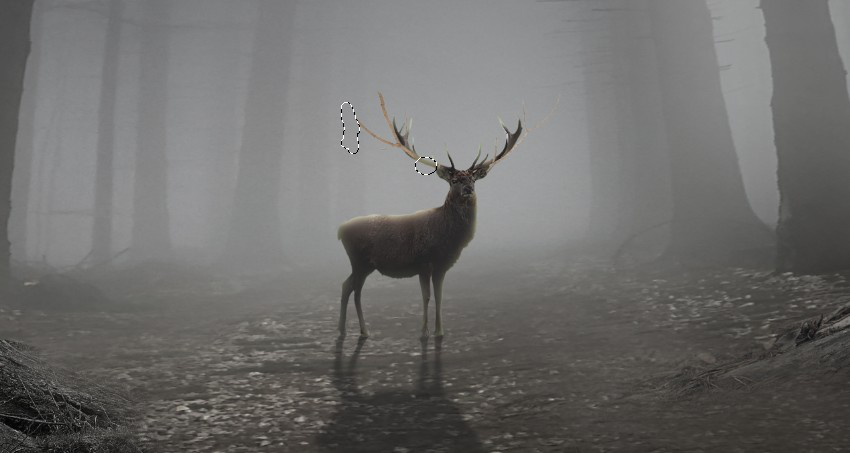
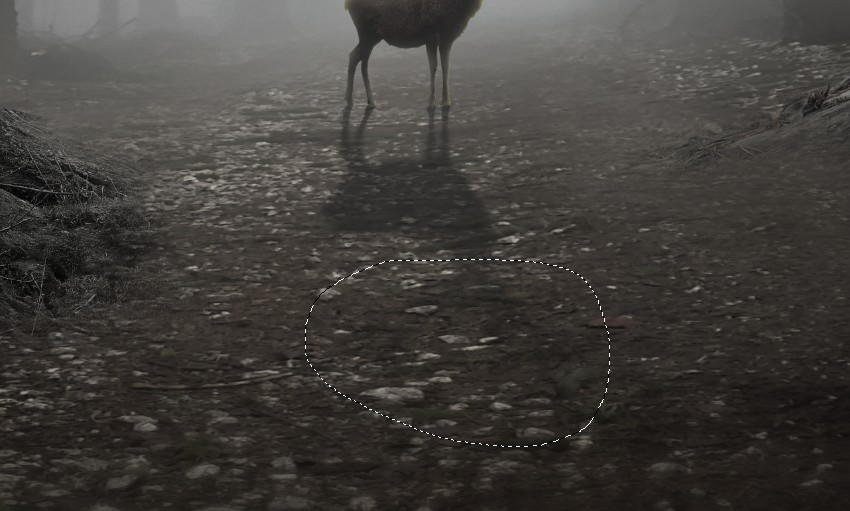
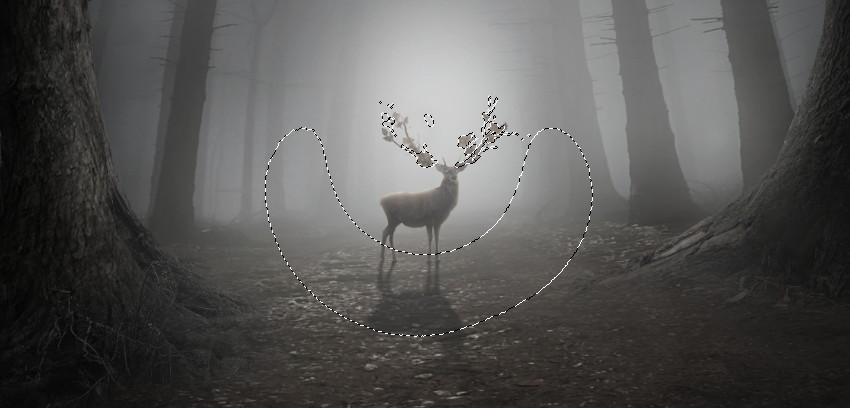
4.用仿制图章工具把图上选区所示区域去掉
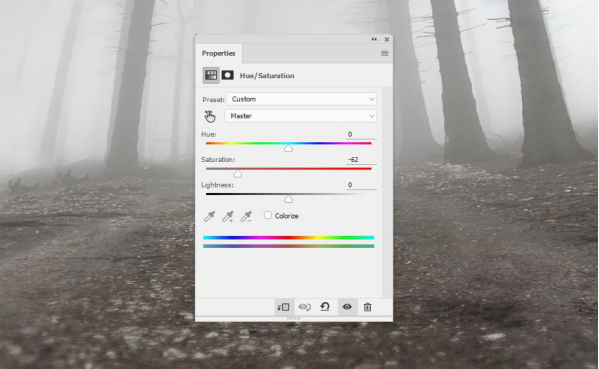
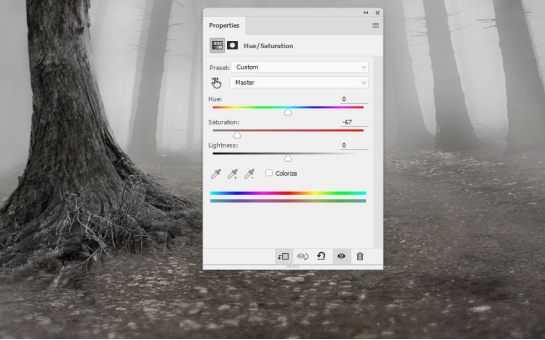
5.新建色相/饱和度调整图层,饱和度降为 -62,并右键建立剪贴蒙版
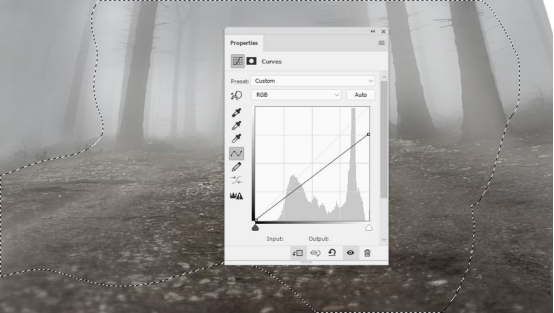
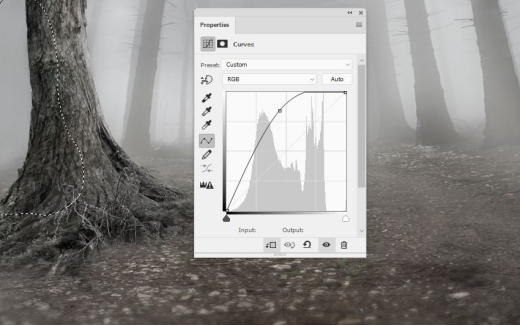
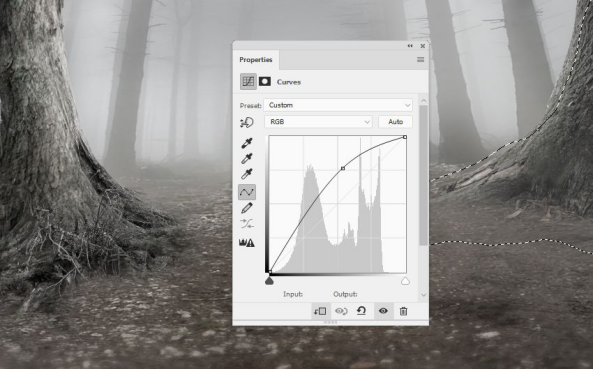
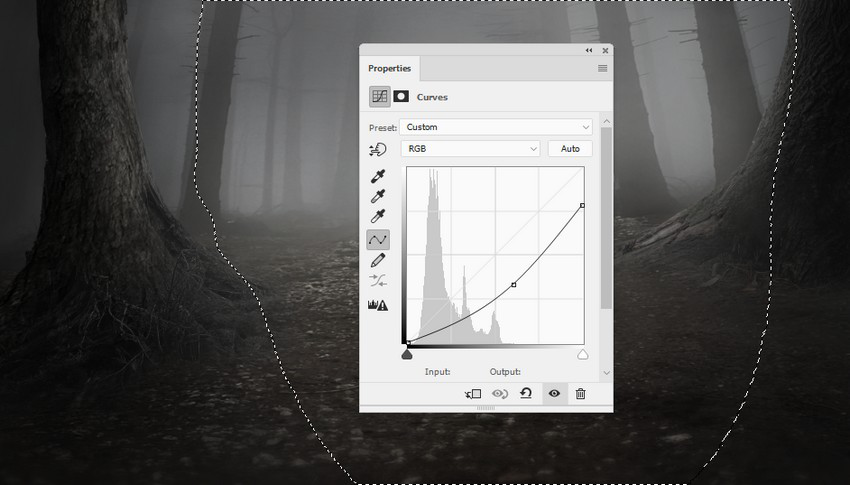
6.新建曲线调整图层,新建蒙版擦除不需要的部分,并右键建立剪贴蒙版
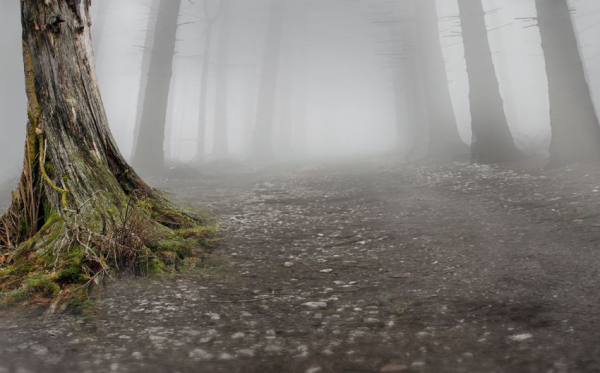
步骤二 导入树木素材
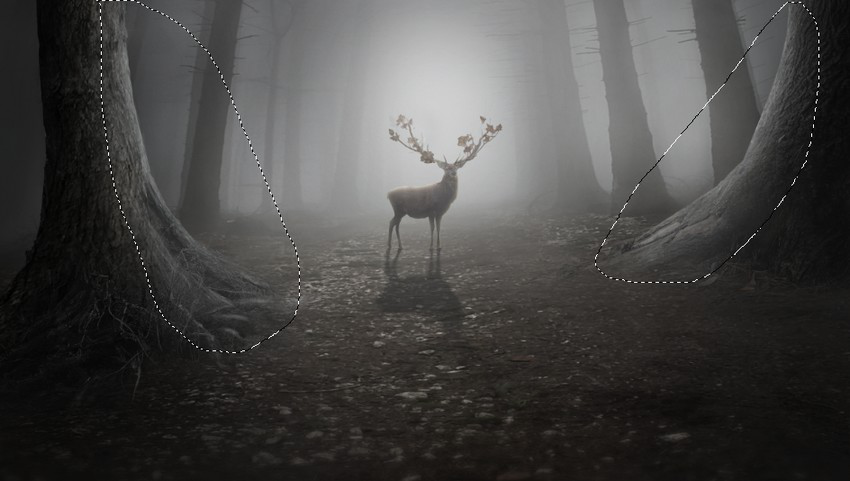
1.导入树1素材,使用多边形套索工具(L)选择树和根部周围,并将其放置在画布左侧边缘,点击编辑-变换-水平翻转

2.给树1图层添加蒙版,用黑色柔边笔刷擦除边缘,使树根与地面更为融合
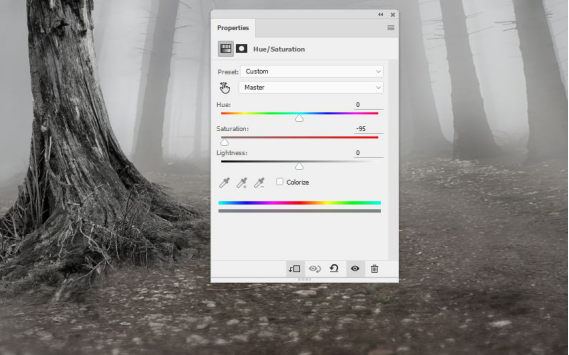
3.新建色相/饱和度调整图层,饱和度设置为 -95,并右键建立剪贴蒙版
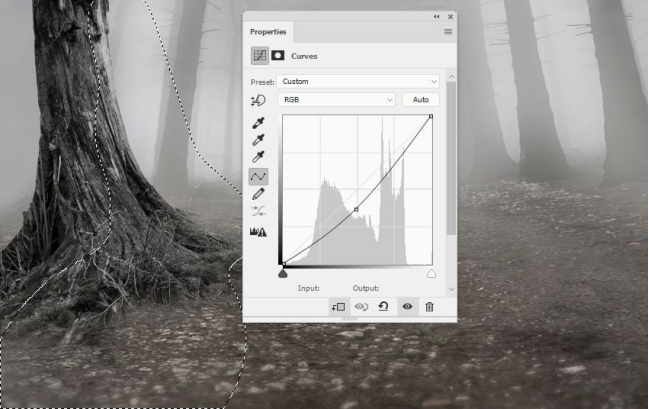
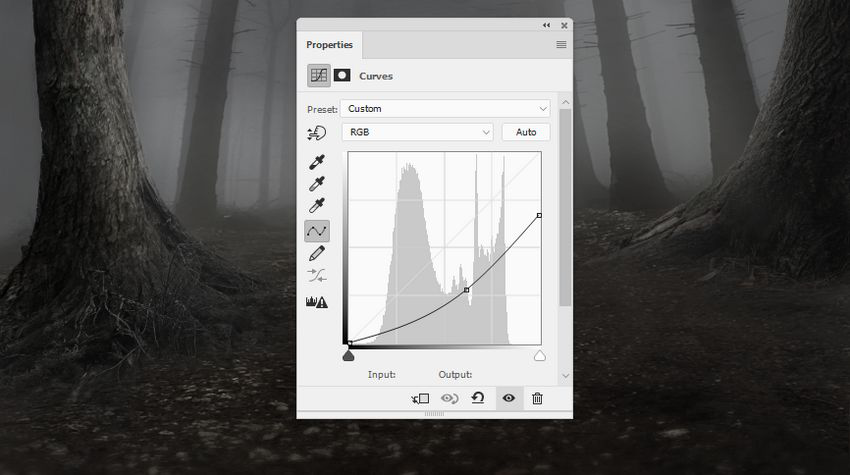
4.新建曲线调整图层降低亮度,并在蒙版上擦除不需要的区域
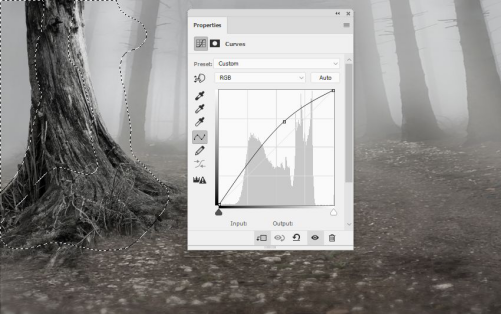
5.再次新建曲线调整图层,加强树的亮部,并右键新建剪贴蒙版
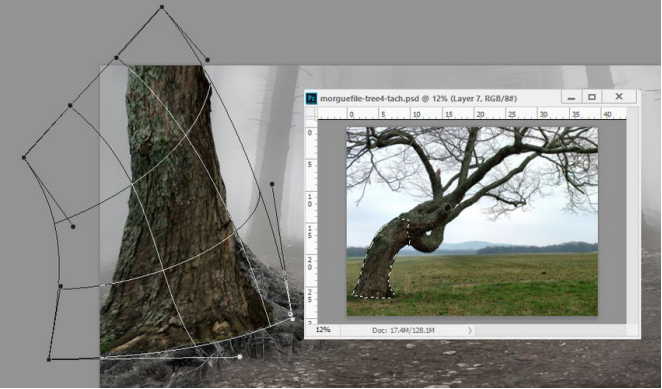
6.因为树1素材的纹理不是很好看,所以用另一棵树来覆盖。打开树2素材,用套索工具选择部分树干纹理之后,放在树1素材上,按 Ctrl+T,右键扭曲调整以适应树1
7.在树2纹理上新建蒙版,用画笔擦除使其更加融合
8.新建色相/饱和度调整图层,把饱和度设置为 -67,并右键新建剪贴蒙版
9.新建曲线调整图层,用画笔在蒙版上加强阴影,并右键新建剪贴蒙版
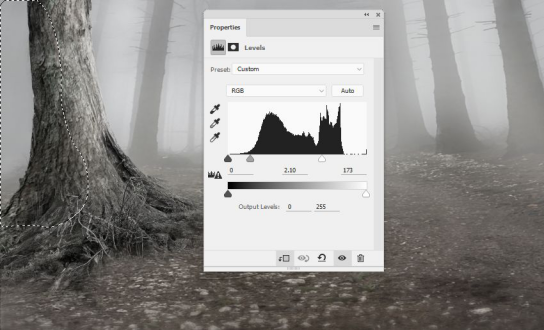
10.新建色阶调整图层,同样方法加强光影
11.打开树3素材,同样用套索工具把树抠出来放在画布右侧,并水平翻转
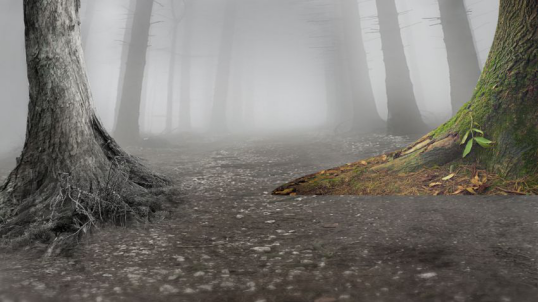
12.在树3图层添加蒙版,用黑色柔边画笔擦除使其更加融合
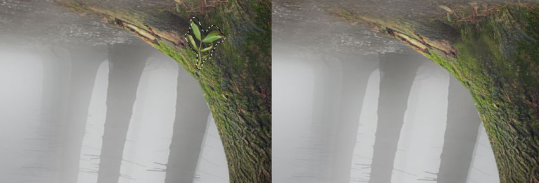
13.用仿制图章工具把树3素材上的叶子去除掉
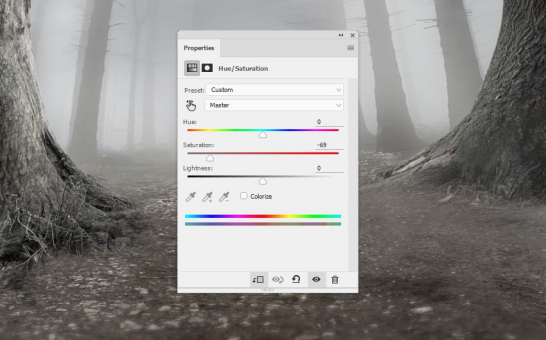
14.新建色相/饱和度调整图层,饱和度设置为 -69,并右键新建剪贴蒙版
15.新建曲线调整图层给树3素材提亮,并右键新建剪贴蒙版
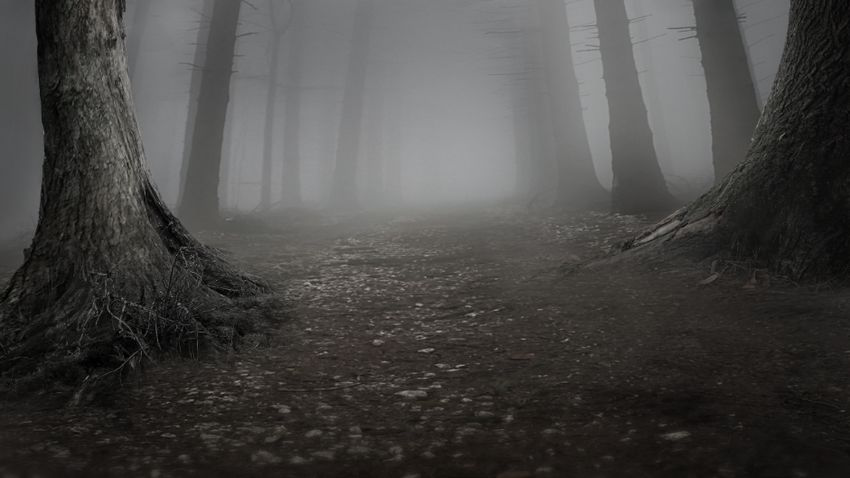
步骤三 微调
1.在图层顶部新建曲线调整图层,使整个场景变暗,并用不透明度较低(20-25%)的黑色柔边画笔稍微擦除中间区域

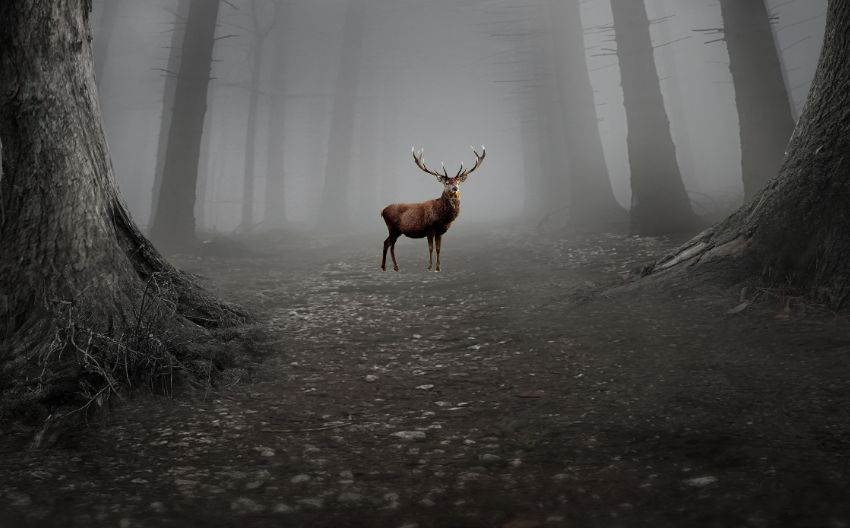
步骤四 添加小鹿素材
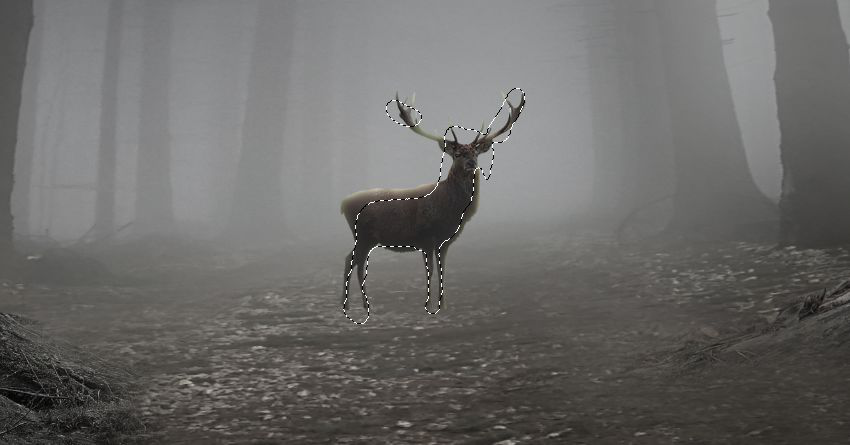
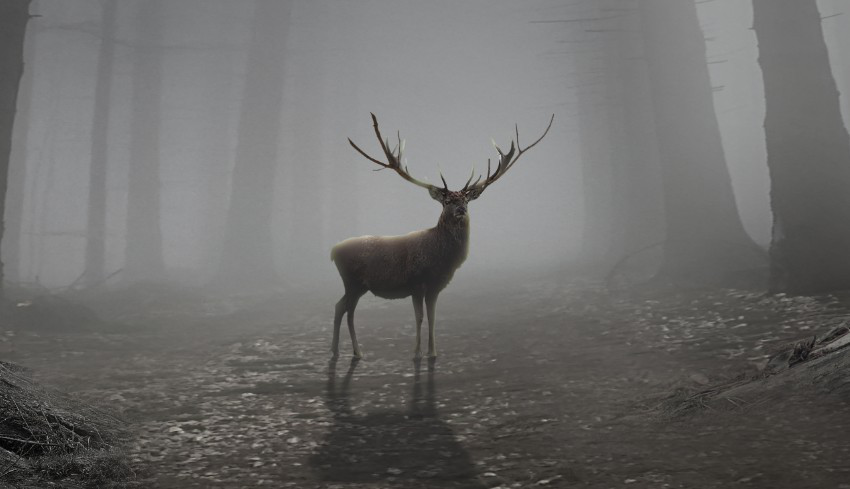
1.把小鹿抠出来,放在地上中间部分
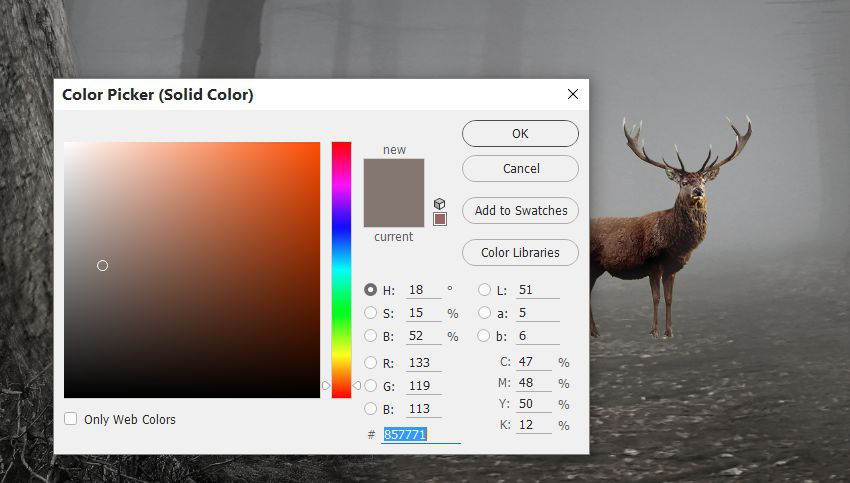
2.新建纯色调整图层,选择颜色 #857771,把不透明度降为 30%,并右键建立剪贴蒙版
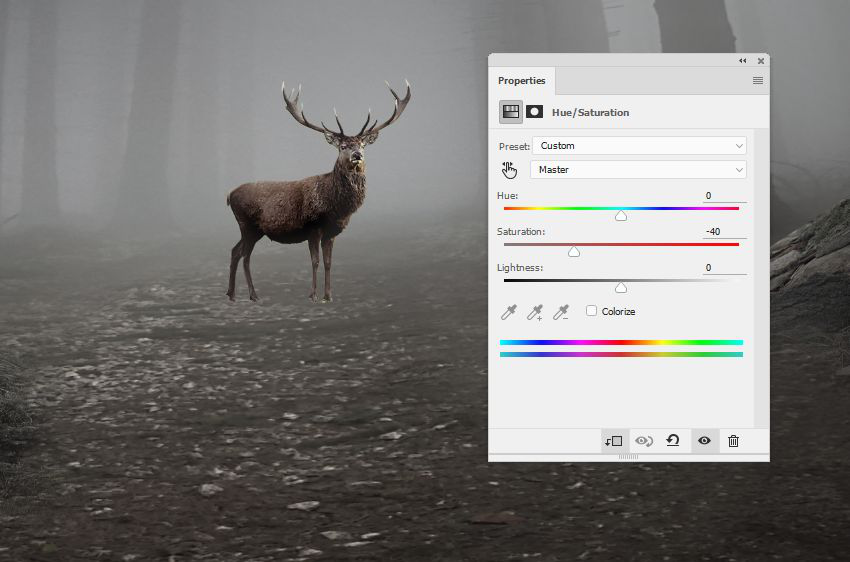
3.新建色相/饱和度调整图层,饱和度设置为 -40,并右键建立剪贴蒙版
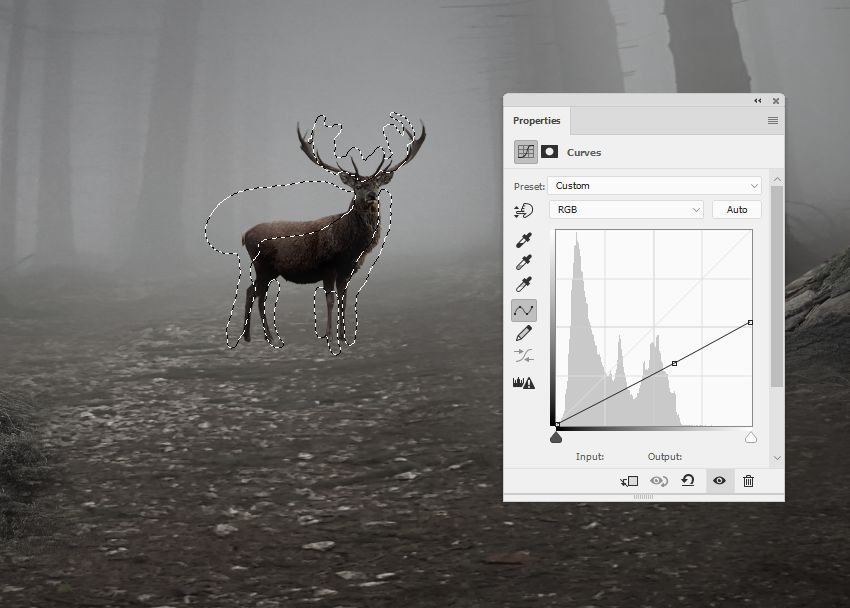
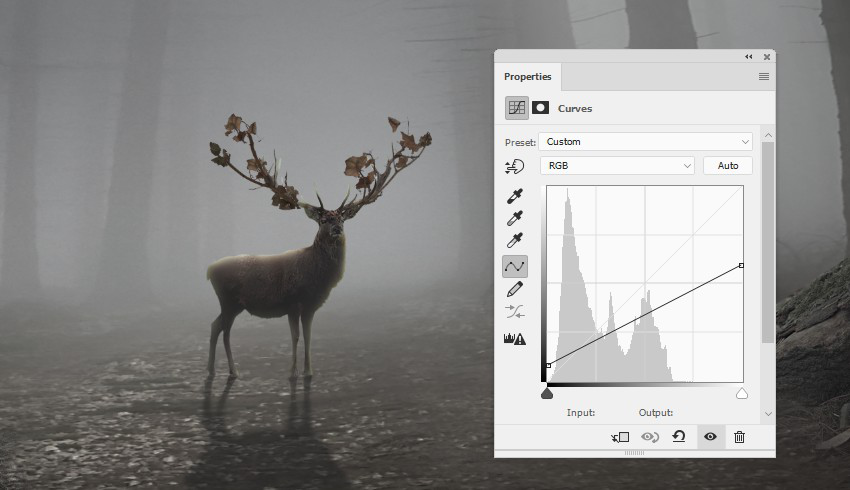
4.新建曲线调整图层,压暗小鹿,用蒙版擦除光源处,并右键建立剪贴蒙版
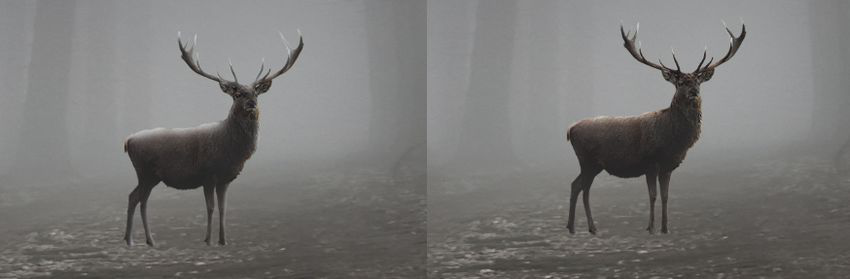
5.再新建一个曲线调整图层改变小鹿的对比度,使小鹿看起来更朦胧

6.新建图层,用颜色为 #d1d9dd 的画笔在小鹿的外侧加强高光,将图层模式改为叠加
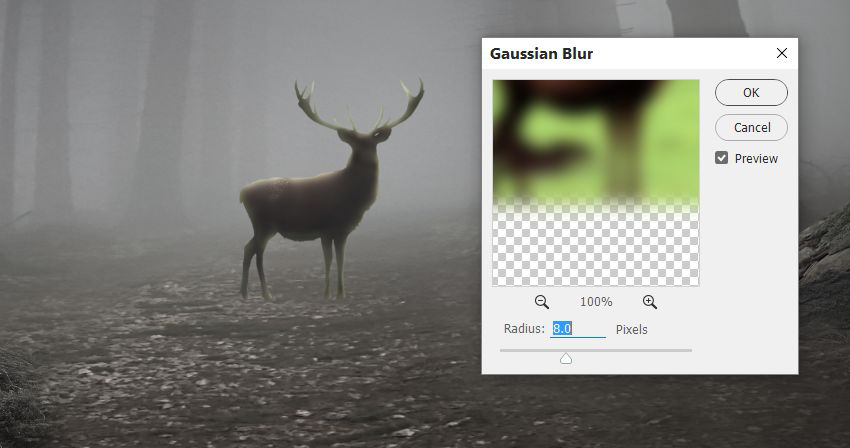
7.右键把小鹿图层转化为智能对象,添加高斯模糊,半径 8px,在蒙版上用柔边画笔擦除不需要被虚化的区域
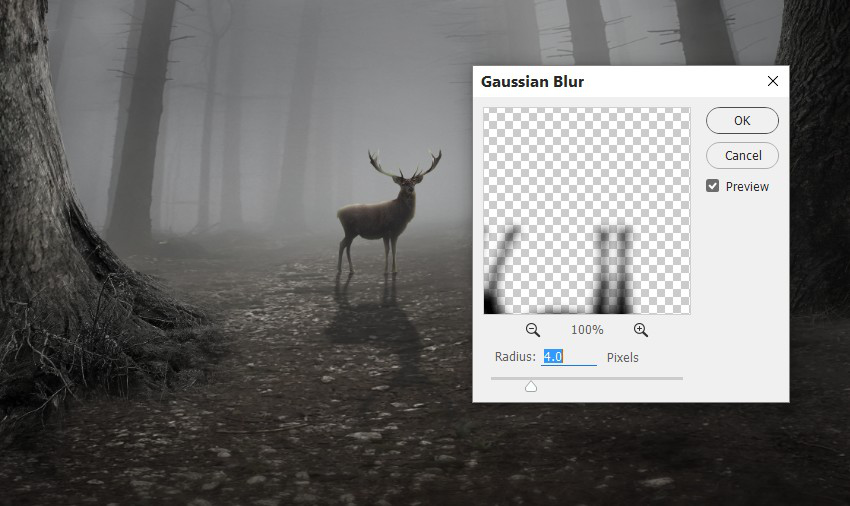
8.我们的目标是把中间设置为主光源,所以小鹿的阴影应该也是在正前方。在小鹿图层下方新建图层,按住 Ctrl ,鼠标左键点击小鹿的图层,得到选区之后,选择新图层,填充黑色,并垂直翻转。按 Ctrl+T,右键选择透视,使阴影趴在地上,把不透明度降低为 60%,并添加半径 4px 的高斯模糊

步骤五 添加树枝和树叶
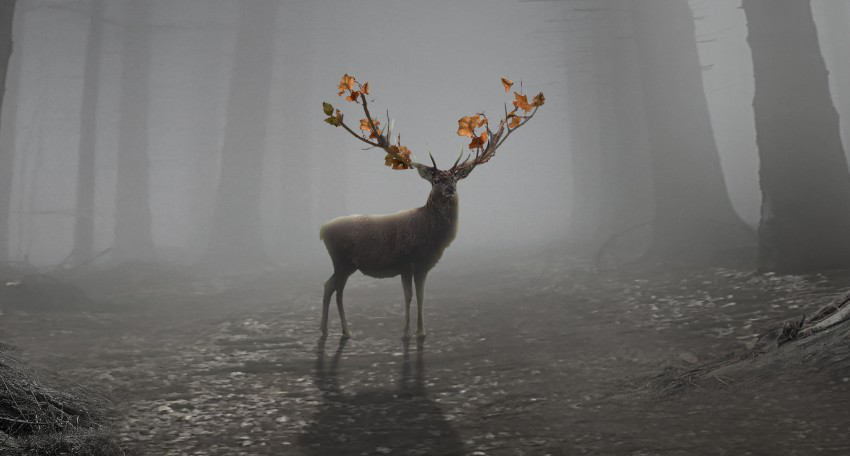
1.导入树枝素材,把它们放在鹿角上,按 Ctrl+T,右键选变形,将其扭曲成所需的形状,并使用蒙版使其与鹿角更加融合
2.选中所有树枝图层,按 Ctrl+G 编组,新建曲线调整图层压暗树枝,右键建立剪贴蒙版
3.打开叶子素材,把叶子的不同部位放在树枝上,复制、并调整、旋转叶子,使它们看起来各不相同
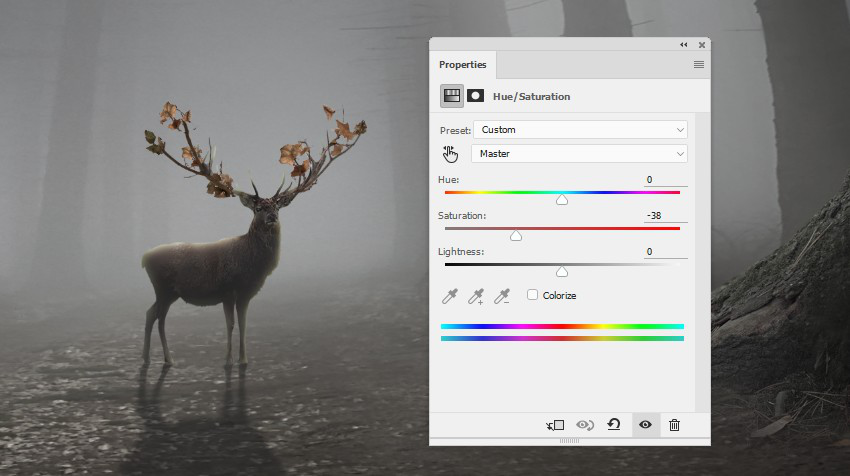
4.选中所有叶子图层,按 Ctrl+G 编组,新建色相/饱和度图层,饱和度设为 -38,并右键建立剪贴蒙版
5.新建曲线调整图层压暗树叶,并右键建立剪贴蒙版
6.用之前做小鹿阴影一样的方法,给树枝和树叶也添加阴影,把不透明度降为30%,因为它们比鹿角的阴影离光源更远
步骤六 最后调整
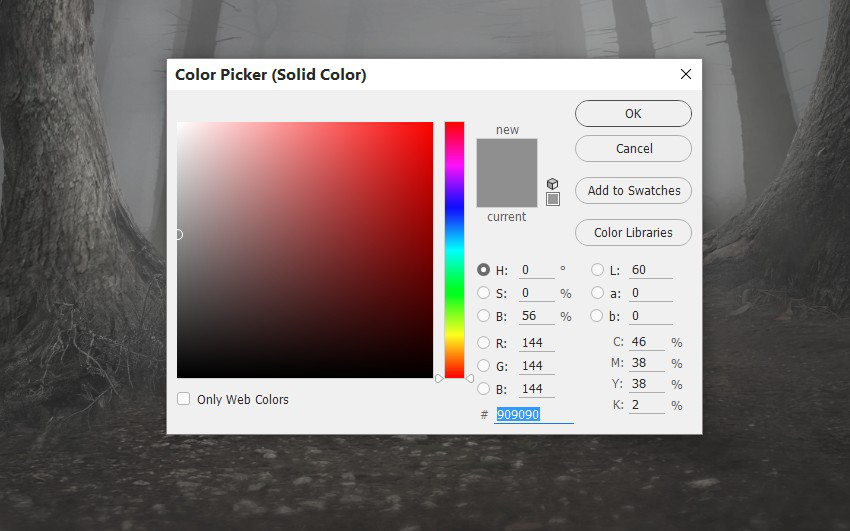
1.在图层顶部新建纯色调整图层,颜色设置为 #909090,图层不透明度改为20%
2.在蒙版上用不透明度为 40-45% 的黑色柔边笔刷,擦除边缘

3.新建曲线调整图层压暗画面,用黑色柔边画笔擦除中间区域
4.新建图层,用颜色为 #f2f2f2 的画笔在森林中间绘制光源,把图层模式改为柔光,并用蒙版减少小鹿顶部和脚步周围的光线

5.新建图层,用同样颜色的画笔在树木边缘绘制,图层模式改为叠加
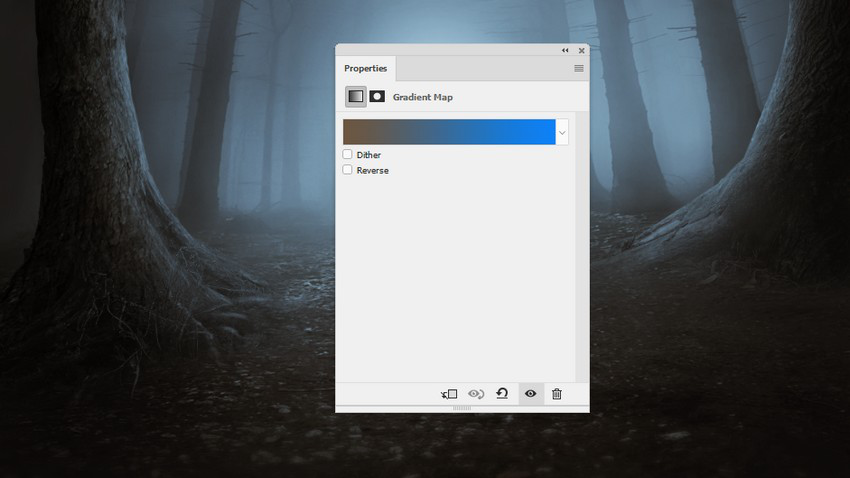
6.新建渐变映射调整图层,颜色设置为 #6f5740 和 #0082fb,图层模式改为柔光,不透明度90%
7.再新建一个渐变映射调整图层,颜色设置为 #996a65 和 #c6e6d3,图层模式改为柔光

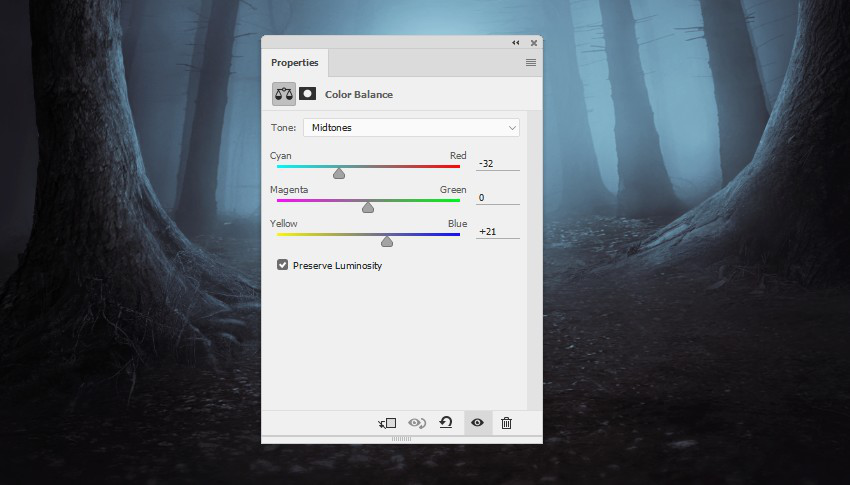
8.新建色彩平衡调整图层,调整中间调的色值
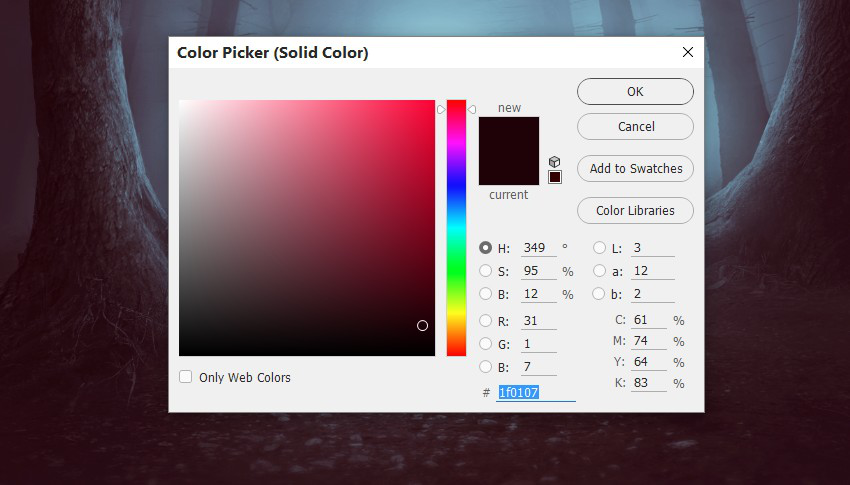
9.新建纯色调整图层,颜色设置为 #1f0107,图层模式改为排除
10.再新建一个渐变映射调整图层,颜色分别为 #847c74 和 #62a065,图层模式改为柔光

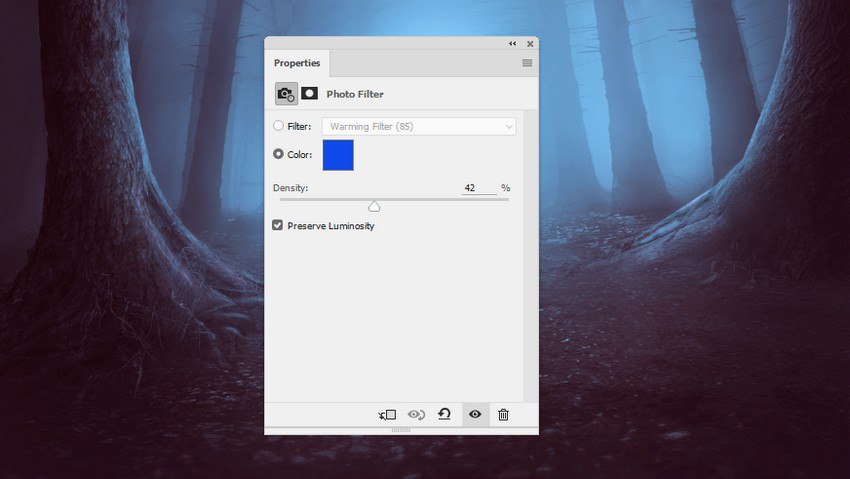
11.添加照片滤镜调整图层,颜色改为 #0149ec
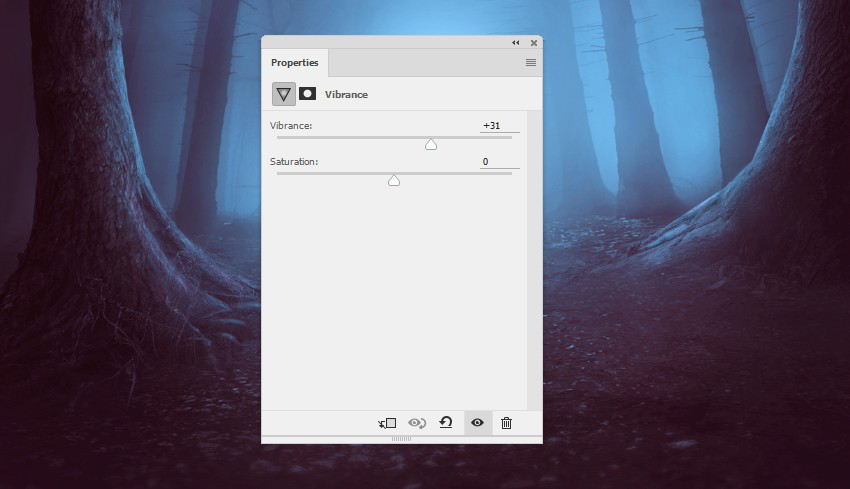
12.新建自然饱和度调整图层,设置数值如图
最终效果

结语:
本期教程到这里就结束了,希望大家在练习过程中多思考、理解制作思路和操作方法,活学活用。
素材下载:
链接: https://pan.baidu.com/s/1mitHQDM 密码: udbd
原文:PS教程!教你合成神秘森林场景
教程翻译:如如酱w
教程作者: Jenny Le (授权翻译)
出处:https://uiiiuiii.com/photoshop/121238507.html
英文链接:https://design.tutsplus.com/tutorials/create-a-mysterious-forest-scene-with-photoshop--cms-28126?_ga=2.198720815.1636832733.1513673605-1130815594.1513673605
“在漆黑的森林里看到一束光,微若便好 ”,你在这微光森林里踟蹰,不经意的一次回眸,就构成了这幅唯美的场景。本教程教大家使用PS还原这幅森林微光的场景,步骤不多但却很美,适合做合成的初学者。
最终效果:
步骤一 构建基础场景
1.新建文档,宽 2000px,高 1130px
2.导入森林素材,按 Ctrl+T ,右键选择变形,做出如图所示效果(原素材失链,只找到类似素材)
3.右键把森林素材转换为智能对象,点击滤镜-模糊-高斯模糊,半径 8px,在蒙版上用黑色柔边画笔擦除背景
4.用仿制图章工具把图上选区所示区域去掉
5.新建色相/饱和度调整图层,饱和度降为 -62,并右键建立剪贴蒙版
6.新建曲线调整图层,新建蒙版擦除不需要的部分,并右键建立剪贴蒙版
步骤二 导入树木素材
1.导入树1素材,使用多边形套索工具(L)选择树和根部周围,并将其放置在画布左侧边缘,点击编辑-变换-水平翻转
2.给树1图层添加蒙版,用黑色柔边笔刷擦除边缘,使树根与地面更为融合
3.新建色相/饱和度调整图层,饱和度设置为 -95,并右键建立剪贴蒙版
4.新建曲线调整图层降低亮度,并在蒙版上擦除不需要的区域
5.再次新建曲线调整图层,加强树的亮部,并右键新建剪贴蒙版
6.因为树1素材的纹理不是很好看,所以用另一棵树来覆盖。打开树2素材,用套索工具选择部分树干纹理之后,放在树1素材上,按 Ctrl+T,右键扭曲调整以适应树1
7.在树2纹理上新建蒙版,用画笔擦除使其更加融合
8.新建色相/饱和度调整图层,把饱和度设置为 -67,并右键新建剪贴蒙版
9.新建曲线调整图层,用画笔在蒙版上加强阴影,并右键新建剪贴蒙版
10.新建色阶调整图层,同样方法加强光影
11.打开树3素材,同样用套索工具把树抠出来放在画布右侧,并水平翻转
12.在树3图层添加蒙版,用黑色柔边画笔擦除使其更加融合
13.用仿制图章工具把树3素材上的叶子去除掉
14.新建色相/饱和度调整图层,饱和度设置为 -69,并右键新建剪贴蒙版
15.新建曲线调整图层给树3素材提亮,并右键新建剪贴蒙版
步骤三 微调
1.在图层顶部新建曲线调整图层,使整个场景变暗,并用不透明度较低(20-25%)的黑色柔边画笔稍微擦除中间区域
步骤四 添加小鹿素材
1.把小鹿抠出来,放在地上中间部分
2.新建纯色调整图层,选择颜色 #857771,把不透明度降为 30%,并右键建立剪贴蒙版
3.新建色相/饱和度调整图层,饱和度设置为 -40,并右键建立剪贴蒙版
4.新建曲线调整图层,压暗小鹿,用蒙版擦除光源处,并右键建立剪贴蒙版
5.再新建一个曲线调整图层改变小鹿的对比度,使小鹿看起来更朦胧
6.新建图层,用颜色为 #d1d9dd 的画笔在小鹿的外侧加强高光,将图层模式改为叠加
7.右键把小鹿图层转化为智能对象,添加高斯模糊,半径 8px,在蒙版上用柔边画笔擦除不需要被虚化的区域
8.我们的目标是把中间设置为主光源,所以小鹿的阴影应该也是在正前方。在小鹿图层下方新建图层,按住 Ctrl ,鼠标左键点击小鹿的图层,得到选区之后,选择新图层,填充黑色,并垂直翻转。按 Ctrl+T,右键选择透视,使阴影趴在地上,把不透明度降低为 60%,并添加半径 4px 的高斯模糊
步骤五 添加树枝和树叶
1.导入树枝素材,把它们放在鹿角上,按 Ctrl+T,右键选变形,将其扭曲成所需的形状,并使用蒙版使其与鹿角更加融合
2.选中所有树枝图层,按 Ctrl+G 编组,新建曲线调整图层压暗树枝,右键建立剪贴蒙版
3.打开叶子素材,把叶子的不同部位放在树枝上,复制、并调整、旋转叶子,使它们看起来各不相同
4.选中所有叶子图层,按 Ctrl+G 编组,新建色相/饱和度图层,饱和度设为 -38,并右键建立剪贴蒙版
5.新建曲线调整图层压暗树叶,并右键建立剪贴蒙版
6.用之前做小鹿阴影一样的方法,给树枝和树叶也添加阴影,把不透明度降为30%,因为它们比鹿角的阴影离光源更远
步骤六 最后调整
1.在图层顶部新建纯色调整图层,颜色设置为 #909090,图层不透明度改为20%
2.在蒙版上用不透明度为 40-45% 的黑色柔边笔刷,擦除边缘
3.新建曲线调整图层压暗画面,用黑色柔边画笔擦除中间区域
4.新建图层,用颜色为 #f2f2f2 的画笔在森林中间绘制光源,把图层模式改为柔光,并用蒙版减少小鹿顶部和脚步周围的光线
5.新建图层,用同样颜色的画笔在树木边缘绘制,图层模式改为叠加
6.新建渐变映射调整图层,颜色设置为 #6f5740 和 #0082fb,图层模式改为柔光,不透明度90%
7.再新建一个渐变映射调整图层,颜色设置为 #996a65 和 #c6e6d3,图层模式改为柔光
8.新建色彩平衡调整图层,调整中间调的色值
9.新建纯色调整图层,颜色设置为 #1f0107,图层模式改为排除
10.再新建一个渐变映射调整图层,颜色分别为 #847c74 和 #62a065,图层模式改为柔光
11.添加照片滤镜调整图层,颜色改为 #0149ec
12.新建自然饱和度调整图层,设置数值如图
最终效果
结语:
本期教程到这里就结束了,希望大家在练习过程中多思考、理解制作思路和操作方法,活学活用。
素材下载:
链接: https://pan.baidu.com/s/1mitHQDM 密码: udbd
原文:PS教程!教你合成神秘森林场景
教程翻译:如如酱w
教程作者: Jenny Le (授权翻译)
出处:https://uiiiuiii.com/photoshop/121238507.html
英文链接:https://design.tutsplus.com/tutorials/create-a-mysterious-forest-scene-with-photoshop--cms-28126?_ga=2.198720815.1636832733.1513673605-1130815594.1513673605